In the world of printing, clarity is king. A single speck of debris or a tiny smudge can turn a perfect print job into a frustrating mess of white lines and blotches. For businesses and individuals alike, maintaining the pristine condition of your printer’s imaging unit lenses is not just a matter of cleanliness; it’s necessary for professional, high-quality output. But when do you know it’s time to clean this crucial component? And more importantly, how do you do it?
Enter Strategic Technology Partners of Texas (STPT), seasoned veterans in the realm of printer maintenance. With thousands of printers serviced, we’ve seen it all and cleaned it all. Our expertise is not just in the routine tasks but in ensuring that your printer operates at its peak performance, day in and day out.
In this comprehensive guide, we’ve enlisted the help of Matthew, a printer technician with years of hands-on experience in printer repairs. He’ll guide you through the process of cleaning the imaging unit lenses in your Xerox VersaLink C400/C405 printers.
After reading this guide, you’ll not only have gained the knowledge to maintain your printer’s lenses but also the confidence to tackle this task with ease.
Why Should You Clean Your Imaging Unit Lenses?
The imaging unit lens is the heart of your printer’s imaging unit. It’s responsible for transferring your digital documents onto paper with precision and accuracy. Over time, toner dust, paper particles, and environmental debris can accumulate on the lenses, leading to those dreaded white lines and color inconsistencies in your prints. Regular cleaning ensures that each print job is as crisp and vibrant as the first.
If you want to know how to clean the entire printer, read our comprehensive guide on how to safely clean one.
Note: This cleaning guide will also work for these older Xerox models: Phaser 6600, WorkCentre 6605, and WorkCentre 6655.
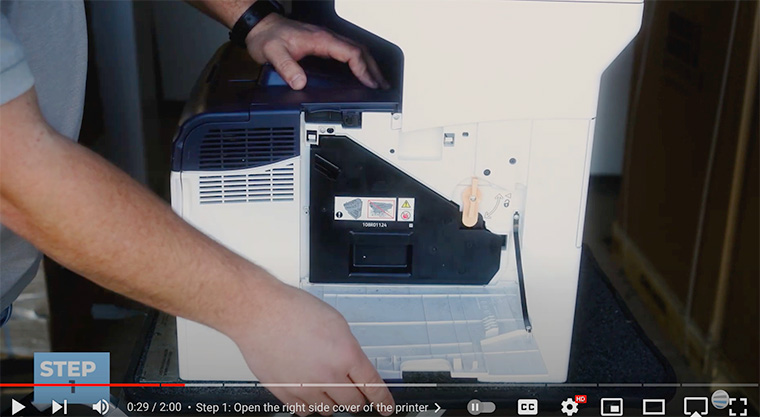
Step 1: Open the Right-Hand Side Cover
Start by opening the side cover on the right side of your printer. Inside, you'll find an orange dial that unlocks the waste toner container.
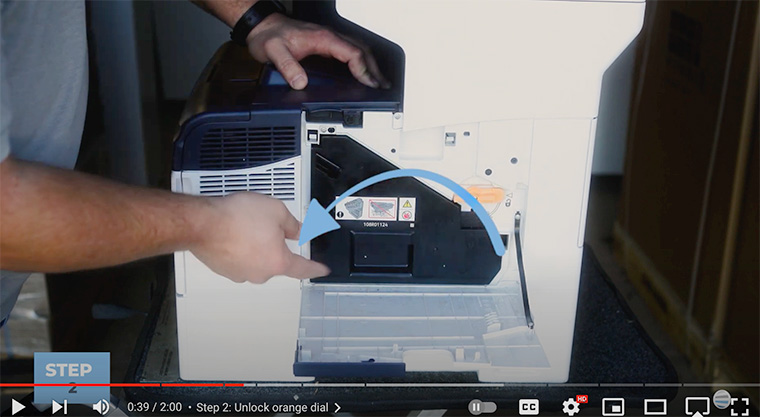
Step 2: Unlock the Orange Dial
Turn the orange dial counterclockwise to the unlock position. This action will allow you to remove the waste toner container easily.
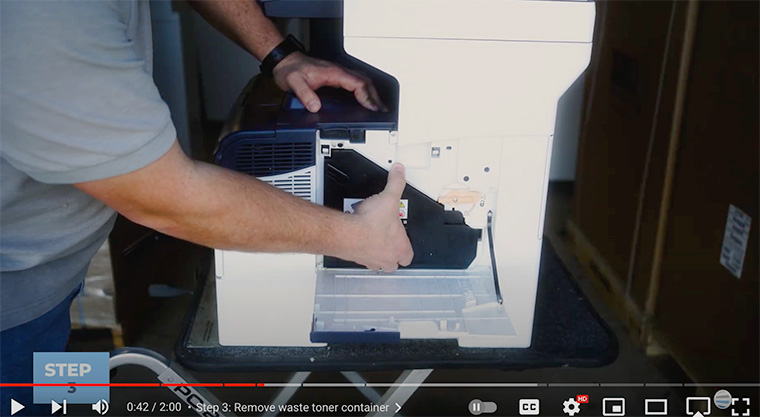
Step 3: Remove the Waste Toner Container
Gently pull out the waste toner container from the machine. This step gives you access to the imaging unit lenses.
Step 4: Remove the Grey Cleaning Rod
Locate the gray cleaning rod attached to the waste toner container.
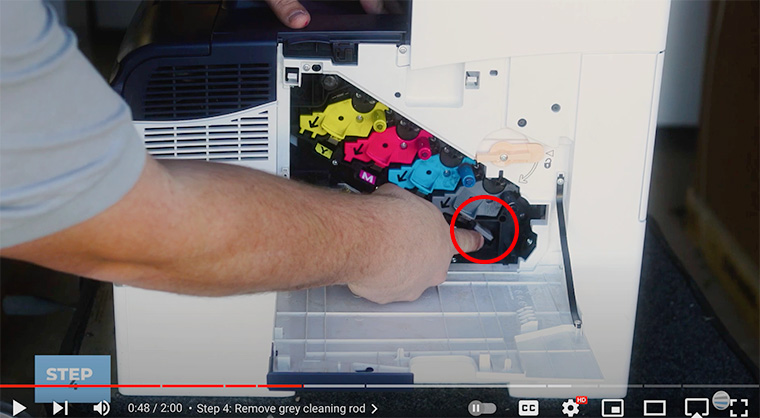
It will have a white felt cloth attached to it.
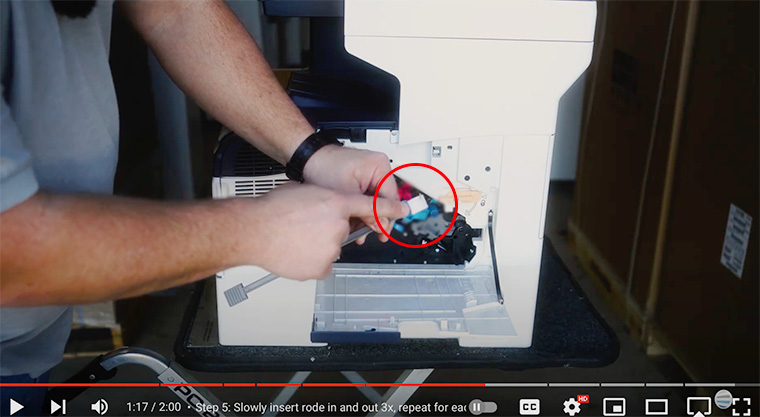
Step 5: Clean the Imaging Unit Lenses
With the felt cloth facing down, slowly insert the cleaning rod into the hole above the letter "Y" on the imaging unit. Push it all the way to the back, then bring it forward in one smooth motion.
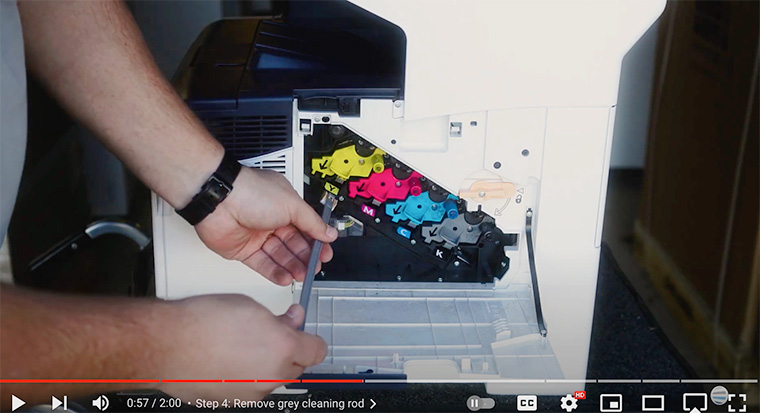
Repeat this process three times for each color.
Step 6: Re-insert the Rod into its Home
Once you've cleaned the lenses for each color, carefully place the cleaning rod back into its designated spot on the waste toner container.
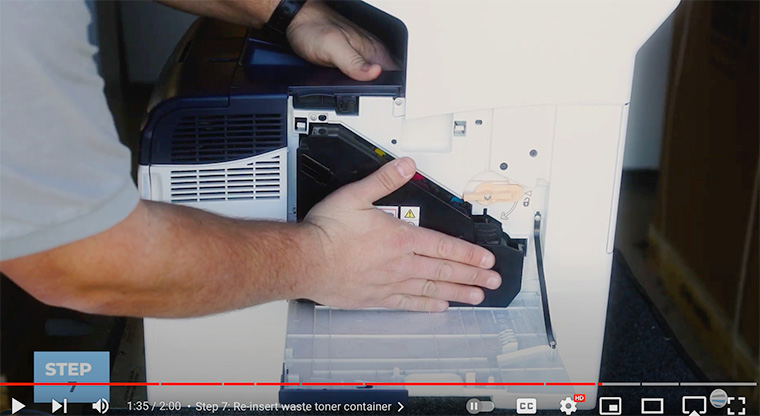
Step 7: Re-insert the Waste Toner Container
Slide the waste toner container back into the machine, ensuring it sits flat and is fully inserted.
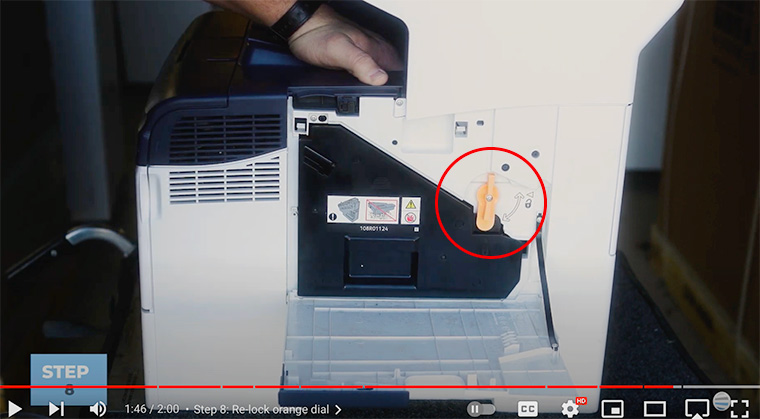
Step 8: Re-lock the Orange Dial
Turn the orange dial clockwise to the lock position. This action secures the waste toner container in place.
Step 9: Close the Right Side Cover
Finally, close the right-hand side cover of your printer.
You've successfully cleaned the imaging unit lenses, and your printer is ready to produce high-quality prints again!
The Importance of a Clean Imaging Unit Lens
A clean lens is not just about avoiding immediate print issues; it’s about ensuring the longevity of your printer. Neglecting this task can lead to a buildup of debris that not only affects your current print jobs but can also cause long-term damage to your printer’s internal components. The result? Costly repairs or replacements that could have been easily avoided.
For more ways to maintain a healthy printer, check out our blog on eight tips to increase the lifespan of your printer or copier.
As you’ve learned, the health of your machine’s imaging unit lenses is vital to the quality of your work. Maintaining a flawless printer output is an ongoing journey, but with the right knowledge and resources, it can be a path to success.
Our Learning Center is a treasure trove of information on everything related to printers and work productivity. From insightful articles to practical guides, we provide you with the right resources to print victory.
Ready for More Printer Tips?
By subscribing to The Printing Workshop on YouTube, you’ll get instant access to video tutorials and printer maintenance tips that will keep you ahead of the curve. Don’t miss out on the opportunity to enhance your printing expertise. Subscribe now and join a community dedicated to excellence in printing.
Need help with a complex copier/printer issue? Don’t hesitate to contact us. Our printer technicians will help you find a solution.
