 Skip to main content
The importance of regular upkeep cannot be overstated when it comes to maintaining the health of your office equipment. Among the various printer parts, the drum lens (or LED array lens) is a critical attention-worthy element.
It’s the heart of your printer’s imaging system, responsible for transferring your documents and images onto paper with clarity and precision. But what happens when your prints start to lose their luster, and you see white lines that streak across your colorful documents? The culprit is often a dirty drum lens, signaling that it’s time for a thorough cleaning or even a replacement.
Strategic Technology Partners of Texas (STPT) has been servicing thousands of copiers for the last 35 years and knows the ins and outs of printer maintenance. We understand that a clean LED lens is not just about aesthetics; it’s about ensuring the longevity and performance of your printer.
That’s why we’ve tasked Matthew, a seasoned printer technician with years of hands-on repair experience, to be your guide. He’ll show you how to clean the drum lens in your Xerox VersaLink C7000 series printer.
By reading this article, you’ll learn the step-by-step procedure for cleaning your LED lens directly from an expert in the field. You’ll discover not only the ‘how’ but also the ‘why’ behind each action, empowering you with the knowledge to keep your printer running smoothly.
If you want to know how to safely clean your whole printer, check out our comprehensive guide.
Note: This guide will work for the following models in the Xerox VersaLink C7000 Series:
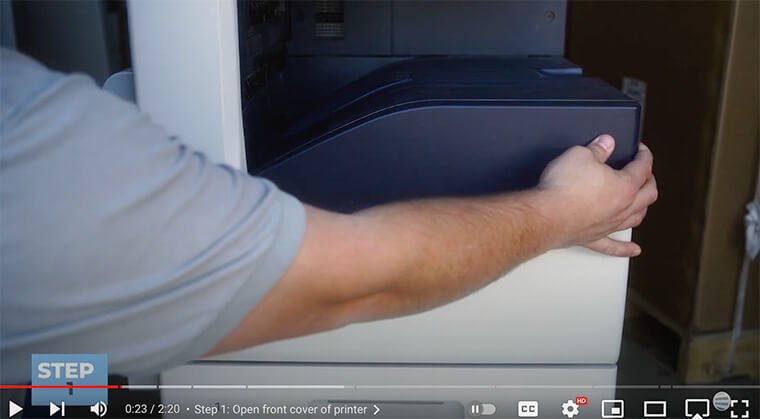
Step 1: Open the Front Cover of the Printer
To begin the cleaning process, open the front cover of your copier. Inside, you'll find the waste toner container, which you must access for the next steps.
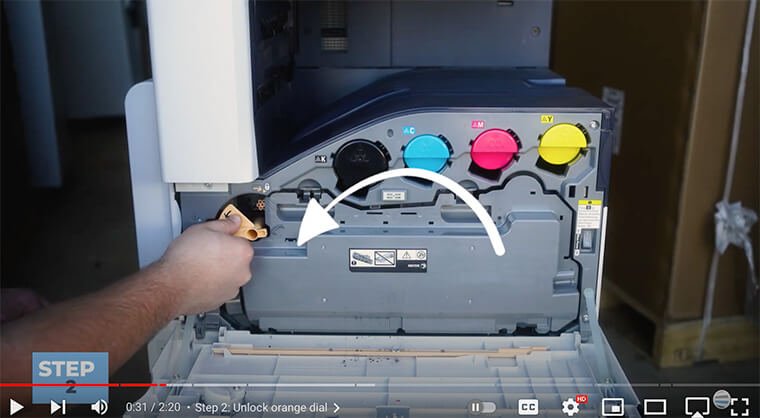
Step 2: Unlock the Orange Dial
Locate the orange dial on the waste toner container and turn it counterclockwise to unlock it.
Step 3: Remove the Waste Toner Container
Then, press the two tabs on the top of the container to release it.
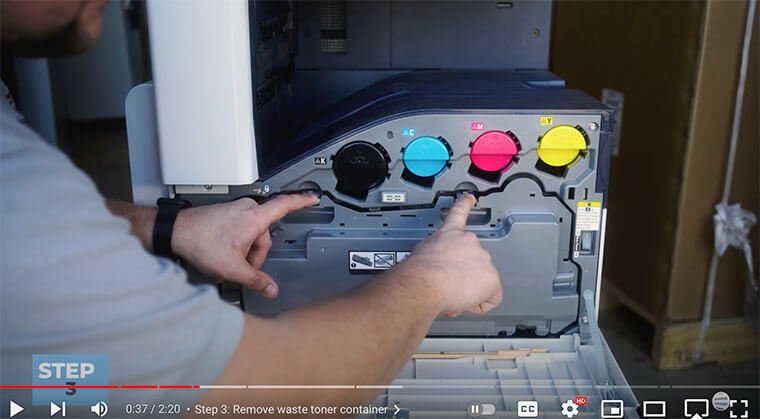
Carefully remove the waste toner container from the copier and set it aside.
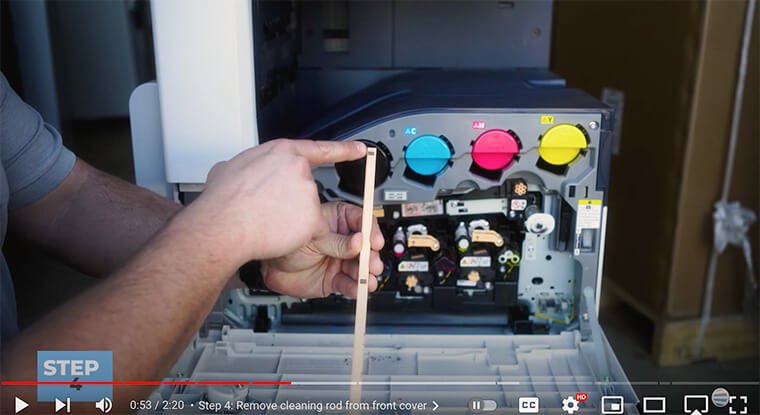
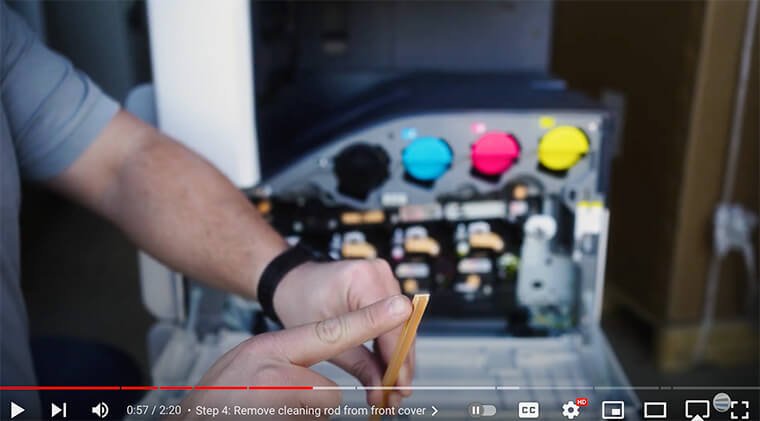
Step 4: Remove the Cleaning Rod from the Front Cover
Find the orange cleaning rod within the copier's front cover.
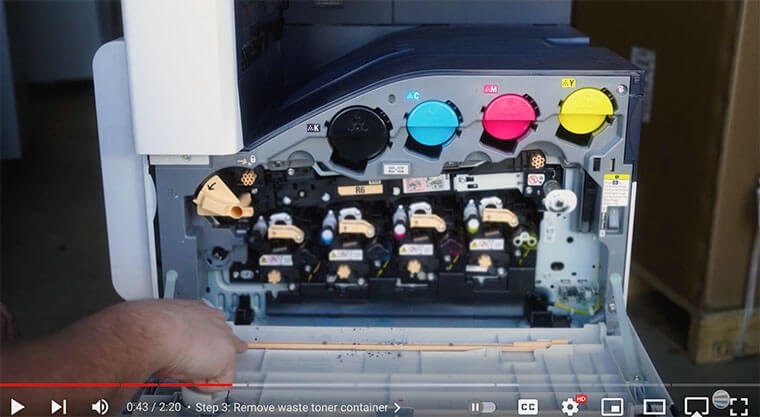
Gently roll it out of its housing to expose the three felt squares on top of it.
Step 5: Clean Each Drum Lens
Notice the U-shape on the bottom of the cleaning rod.
Take the cleaning rod and insert it (with felt squares facing up) into the designated area for each drum lens. Move the rod all the way in and out about three times to ensure the drums are thoroughly cleaned. Repeat this process for each color drum.

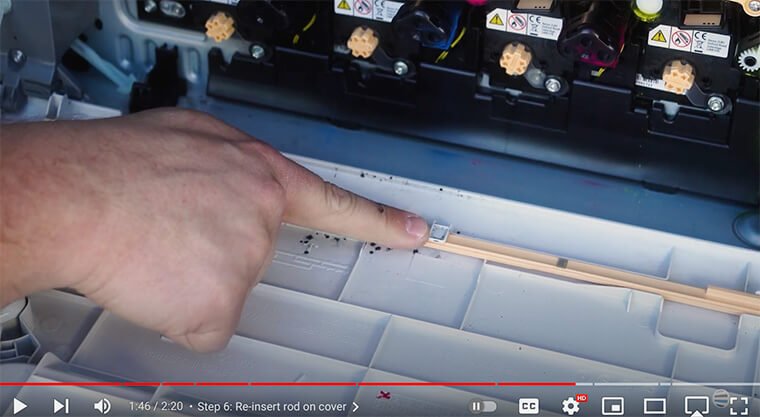
Step 6: Re-insert the Rod on the Cover
After cleaning all drum lenses, re-insert the cleaning rod into its place within the copier's front cover. Ensure it is properly secured under the white clip in the middle.
Step 7: Re-insert the Waste Toner Container
Return the waste toner container to its original position within the copier. Insert the bottom part first and then swing it upwards until it locks securely into place with a good push on the latches.

Then, relock the waste container by turning the orange dial clockwise.
Step 8: Close the Front Cover
Finally, close the front cover of your copier until it clicks.
Congratulations! Your copier’s drum lenses are now clean and ready to produce high-quality prints without any white lines or blemishes.
It’s essential to recognize the significance of a clean LED lens. Neglecting to clean it can lead to a cascade of issues, such as paper jams and even decreased productivity.
With our easy-to-follow guide, you can clean the drum lenses on your Xerox VersaLink C7000 Series printer in just a few minutes. Visit our Learning Center for more helpful guides and printer-related articles.
By ensuring that your drum lenses are debris-free, you’ll preserve the longevity of your printer and maintain high-quality output.
For more ways to maintain your machine, check out our blog on eight tips to increase the lifespan of your printer/copier.
Ready for More Tips?
Don’t let printer problems disrupt your workflow. Take action now by subscribing to The Printing Workshopon YouTube. By joining our community, you’ll get instant access to tutorials and maintenance tips to keep your printer in top condition. Subscribe today and elevate your printing experience to new heights!
If your printer problem can’t be fixed with our guides, don’t hesitate to contact us. Our experienced printer technicians will work to find a solution.
