Many of us are guilty of ignoring the “low supply” warnings from our machines.
You’re busy, so it’s natural to let things slide that aren’t immediately relevant to your day-to-day activities.
Unfortunately, this also means that you probably end up in jams like this one pretty often: a big project is coming up, and you suddenly notice that your printer is alerting you to replace your toner.
You have to replace the printer toner cartridge before you can start your print job. Now that your toner has run out, you have no choice but to replace the cartridge because, otherwise, your machine won’t print. If you can’t print, then you won’t be able to finish your project on time.
That’s where our printer experts at STPT come in.
We use our printer expertise to help you solve the problem quickly and simply with helpful printer how-to guides like this one.
Toner is an important part of the printing process. If your printer toner isn’t replaced on time, then the quality of your prints can be impacted, and you may end up giving yourself more work to do when you’re already on a tight deadline.
Our top-notch service technician, Matthew, is going to walk you through the toner replacement process step-by-step. In this blog, he’ll explain how to quickly change the toner cartridge on several different Xerox printer models so you can get back down to business.
As a service technician at STPT, Matthew simplifies printer maintenance. His how-to quick printer fixes on YouTube have been a big hit, so he’s put together this article to provide a quick, easy-to-read tutorial for those of you who prefer written directions.
Take the pressure off by trusting our STPT printer specialists to help you through it. With almost 40 years in the business, our team has the expertise to make the replacement process quick and easy for you.
Quick Toner Replacement for a Xerox VersaLink C400, Phaser 6600, or WorkCentre 6600 Series Printer
Toner is a powdery substance applied to paper to create an image when you print or copy on a laser machine. Laser printer toner is usually contained within an easy-to-use cartridge to keep things from getting messy.
In this how-to guide, I’ll explain how to replace toner cartridges for the following compatible Xerox printer models:
• VersaLink C400
• VersaLink C405
• Phaser 6600
• WorkCentre 6605
• WorkCentre 6655
Different machines have different needs and settings. That’s why it is important to follow the instructions specific to your Xerox printer model. For more information about replacing toner or the maintenance kit on different Xerox printer models, check out:
• How To Replace the Toner on Your Xerox Printer (Altalink B8100 or C8100 Series)
• How To Replace the Maintenance Kit On Your Xerox VersaLink C400s Series Printer
Let’s uncomplicate printer maintenance by walking through toner replacement. You can follow the process by reading the written instructions provided below (with pictures) or you can watch the video linked at the top of the blog.
Part One: Open the Front Cover of Your Machine to Locate Toner
We will be walking through toner replacement on a Xerox VersaLink C405 mopdel, but the process is the same for the VersaLink C400, Phaser 6600 and WorkCentre 6600 printers.
Replacing the toner on a Xerox VersaLink C400 series printer is simple, but sometimes it helps to watch someone else go through the process step-by-step. If you prefer video instruction, you can check out the how-to video at the top of this blog.
For written instructions, with pictures, keep reading:
1. Open your printer’s front cover. The toner is located centrally behind the front cover. We’ve indicated the location of the color toner with blue arrows on the picture below.
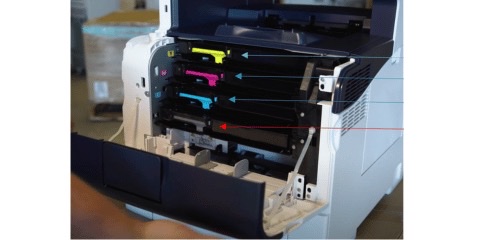
The red arrow points to the black toner, which we will be focusing on as an example for these instructions.
The cartridge at the bottom with a black handle is the black toner.
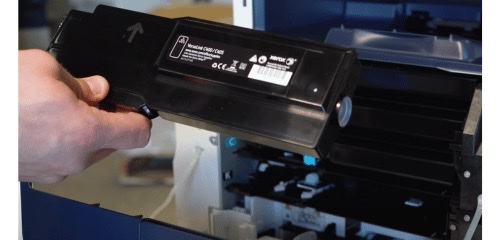
2. After locating your toner cartridge, squeeze the handle and pull the cartridge straight out.
Part Two: Insert New Toner Into Your Printer
1. Your new toner cartridge will come in a box, like this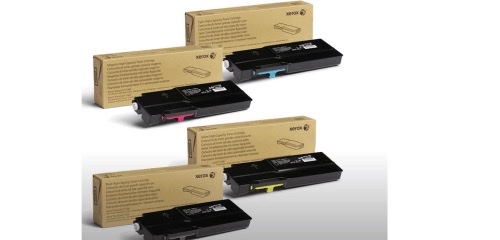
2. Take the new toner cartridge out of the box and prepare to insert it into the slot on your machine.
You may notice that the toner has gears on its side. The number of gears does not matter and will not change the way you insert your toner or how it functions.
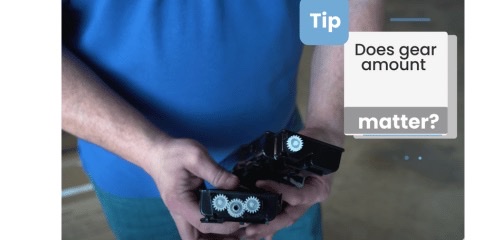
The gears indicate the capacity of the toner cartridge, but whether the cartridge has one or three gears, it will work if the box indicates it is compatible with your printer model.
4. Place the old toner back in the box to reduce mess. If you’re interested in environmental sustainability, then consider recycling your old toner using the Xerox Green World Alliance recycling program.
5. Place your toner in the slot, right-side up as shown in the picture:
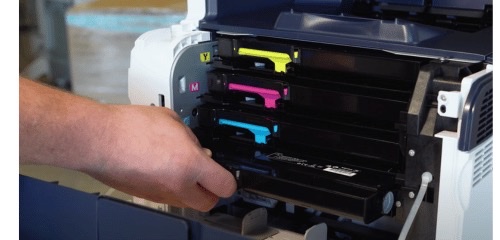
Push the cartridge into the slot. Sometimes it can be hard to push, but it will work with just a bit of force.
6. Close the front cover. You will hear it click when it is fully closed. And that’s it!
Even though toner cartridge replacement sounds complicated, the process is pretty simple. Within a few minutes, you should be done with your replacement, and you can get back to work without losing too much time.
No one wants to have projects back up while they try to figure out how to replace parts or perform routine maintenance.
Following these instructions for toner replacement will ensure you don’t get bogged down while trying to make a quick replacement. You can find more helpful how-to blogs on our learning center.
Need Another Quick Printer Fix?
If you want to make your printer’s maintenance quicker and easier, check out our YouTube channel.
The Printing Workshop gives you free access to all our YouTube video tutorials. Let our service technicians and print experts walk you through simple tech solutions for your Xerox printer.
Have a Problem with Your Copier Printer that isn’t a quick fix? Reach out to us. We’d love to help.
