 Skip to main content
Replacing the waste toner container on one of the Xerox AltaLink B8200 Series printers is one of the simpler maintenance tasks on this machine and usually only takes a few minutes.
We've serviced thousands of Xerox copiers and printers across North Texas over the past 40+ years. Our technicians perform maintenance procedures like this every day, helping businesses keep their devices running smoothly and avoid unnecessary downtime.
In this guide, Matthew, a technician with several years of hands-on Xerox repair experience, will walk you through the exact process of replacing the waste toner container on a Xerox AltaLink B8200 Series copier.
By the end of this article, you'll know:
- What a waste toner container does
- When it needs to be replaced
- How to replace it safely and correctly
- What mistakes to avoid during the process
Following AEO best practices, this guide includes direct answers, step-by-step instructions, scannable formatting, and concise explanations that make it easy to follow whether you're reading the article or quickly searching for a solution.
Table of Contents
- What Is a Waste Toner Container?
- When Does the Waste Toner Container Need to Be Replaced?
- How to Replace the Waste Toner Container on a Xerox AltaLink B8200
- Common Mistakes to Avoid
- Quick Recap
- FAQ
- Conclusion
What Is a Waste Toner Container?
A waste toner container collects excess toner that is not used during the printing process. When the container gets full, the copier will notify you that it’s time for replacement.
Not all toner applied during printing ends up on the page. Normally, excess toner is removed and directed into the waste toner container to prevent buildup inside the machine.
While it's not something you'll replace as often as a toner cartridge, it is a normal maintenance item that every Xerox copier owner will eventually encounter.
When Does the Waste Toner Container Need to Be Replaced?
You should replace the waste toner container when the copier displays a "Replace Waste Toner Container" message or indicates that the container is full.
Common signs include:
- A notification on the touchscreen
- A maintenance alert from your print management software
- The copier stopping print jobs until replacement occurs
Unlike toner cartridges, a full waste toner container doesn't typically affect print quality first. But the machine usually prevents further use until the container is replaced.
This helps protect internal components from toner overflow and keeps the copier operating properly.
How Do You Replace the Waste Toner Container on a Xerox AltaLink B8200?
To replace the waste toner container on a Xerox AltaLink B8200, open the front cover, remove the full container using the orange handles, carefully keep it level, insert the new container, and close the front cover.
Below is the complete step-by-step process.
Step 1: Open the Front Cover
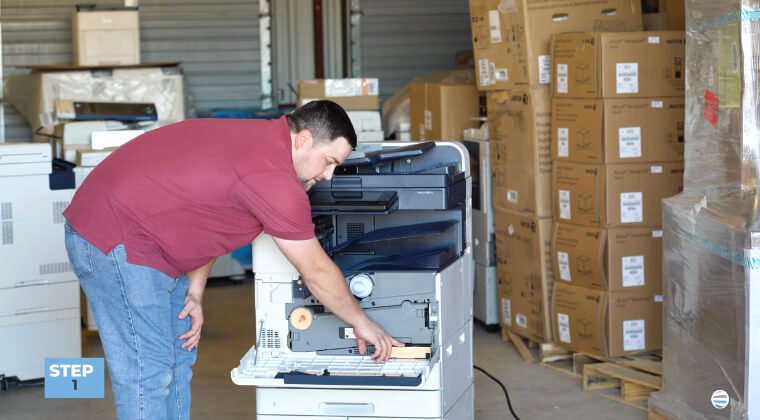
Start by opening the copier's front cover.
In the lower-right corner of the machine, you'll find the waste toner container assembly (sometimes identified as the R5 area).
Look for the orange handle, which makes the container easy to locate.
Quick tip:
Xerox uses orange-colored handles throughout the machine to identify customer-replaceable components.
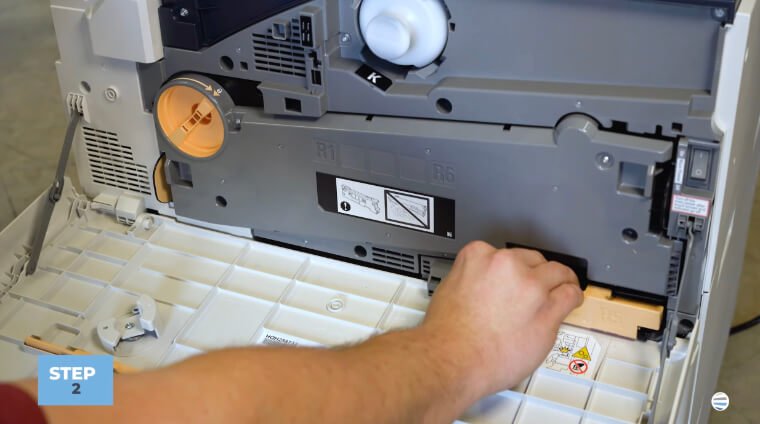
Step 2: Remove the Full Waste Toner Container
Grab the orange handle and pull the assembly straight out.
You'll notice a second orange handle on top of the waste toner container itself. Use this handle to lift and remove the container.
Important Note:
The waste toner container has an opening where excess toner enters the container. If the container is tilted, tipped, or turned sideways, toner can spill out.

To avoid a mess:
- Hold the container level at all times
- Move slowly and steadily
- Avoid shaking or tilting the container
- Set it down on a flat surface immediately after removal
Step 3: Insert the New Waste Toner Container
To install the replacement container:
- Position the new waste toner container in the same orientation as the old one.
- Slide it into the assembly.
- Push it inward until it clicks securely into place.
You shouldn't need excessive force. If the container doesn't slide in easily, double-check its alignment and try again.
The container should:
- Sit flush in the compartment
- Slide in smoothly
- Click securely into position
A properly seated waste toner container allows the copier to resume normal operation.
Step 4: Close the Front Cover
Once the replacement container is installed, close the front cover.
The copier should automatically recognize the new waste toner container and clear the maintenance message.
You're now ready to continue printing.
Common Waste Toner Container Replacement Mistakes to Avoid
This is a simple procedure, but there are a few mistakes we occasionally see during service visits.
- Tilting the Full Container: Because loose toner is stored inside, tilting the container can cause toner to spill out.
- Pulling Too Quickly: Removing the container too aggressively increases the chance of spills.
- Forcing the New Container: The replacement container should slide into place smoothly.
Quick Recap
Here's the process in five simple steps:
- Open the front cover.
- Locate the waste toner container in the lower-right area.
- Pull the container out using the orange handles.
- Keep the container level and install the replacement.
- Slide it in until it clicks and close the front cover.
FAQ
What does a waste toner container do?
A waste toner container collects excess toner that is removed during the printing process. It prevents unused toner from accumulating inside the copier.
Can I continue printing if the waste toner container is full?
In most cases, no. The copier will display a warning and may stop printing until the container is replaced.
Is replacing a waste toner container difficult?
No. Most users can complete the process in just a few minutes without special tools.
What happens if toner spills from the container?
Loose toner can create a mess and may require careful cleanup. Keeping the container level during removal helps prevent spills.
How often does a waste toner container need to be replaced?
It depends on your print volume. Higher-volume environments will fill waste toner containers more quickly than lower-volume offices.
Proper Waste Toner Replacement Helps Keep Your Copier Running Smoothly
Replacing a waste toner container correctly helps protect your Xerox AltaLink B8200 Series printer from toner spills and unnecessary downtime.
By keeping the container level during removal, installing the replacement properly, and ensuring it clicks securely into place, you can get your copier back up and running in just a few minutes.
At STPT, we've spent decades helping businesses maintain Xerox devices, and simple maintenance procedures like this are one of the easiest ways to keep your equipment operating reliably.
Want More Xerox Maintenance Tutorials?
If you found this guide helpful, be sure to subscribe to The Printing Workshop on YouTube.
You'll get access to step-by-step Xerox repair tutorials, copier maintenance guides, troubleshooting tips from experienced technicians, and more
Subscribe today and never miss another printer maintenance tip.
