If you're facing print quality issues with your Xerox printer, it could be due to a faulty transfer roller. Fortunately, your Xerox machine will notify you when the roller needs replacement. If you're receiving such a notification, don't worry! You can have your printer up and running again within minutes with a few easy steps.
In this straightforward guide, we'll walk you through replacing the transfer roller on a Xerox printer, specifically the Xerox AltaLink B8090 model.
Step 1: Open the Left Side Cover
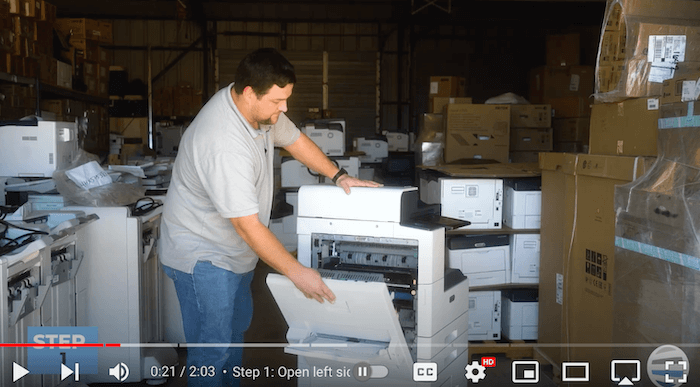
First, you’ll need to open the left-side cover of your printer. Find the release latch halfway down the side and lift the cover to open it.
Step 2: Remove the Old Transfer Roller
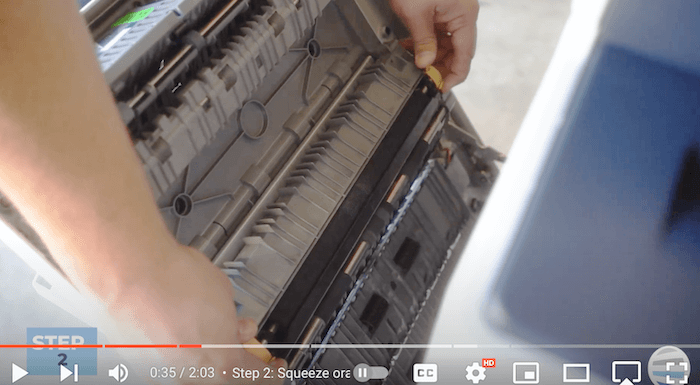
Inside the printer, you'll find the transfer roller marked with an "R4" label and a black arrow. Squeeze the orange clips at the top of the roller with your thumbs while using your index fingers to grip the bottom of the clips. This action will release the transfer roller, allowing you to remove it easily.
Step 3: Insert the New Transfer Roller
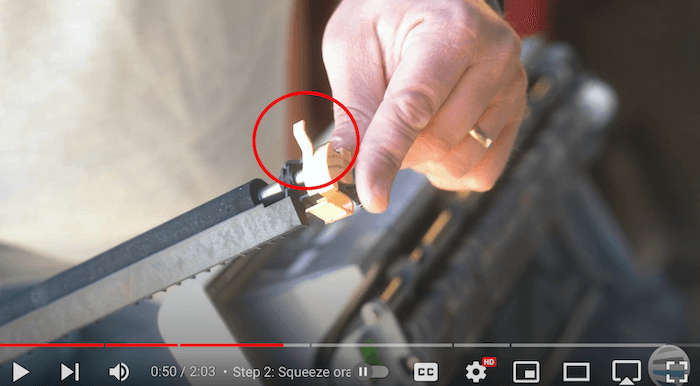
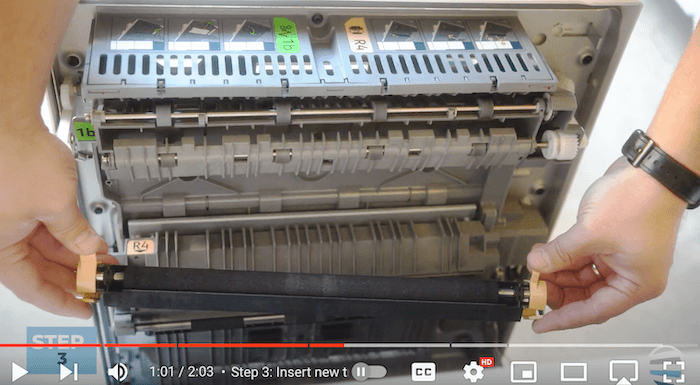
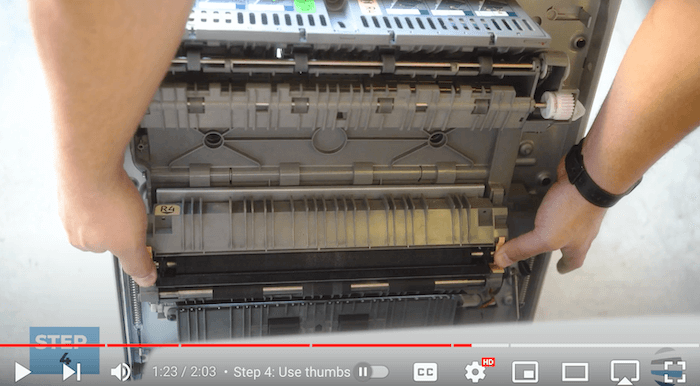
Now, take your new transfer roller and position it correctly. Hold the back "horns" of the roller (shown in the first image below) with your thumbs and the front two latches with your index fingers. Carefully insert the roller into the designated slot, ensuring it aligns properly.
Step 4: Secure the Transfer Roller in Place
With the roller in position, squeeze the front latches with your fingers to lock it into place. Press down on the roller with your thumbs to ensure a secure fit. This step is crucial for proper printer functionality.
Step 5: Close the Left Side Cover
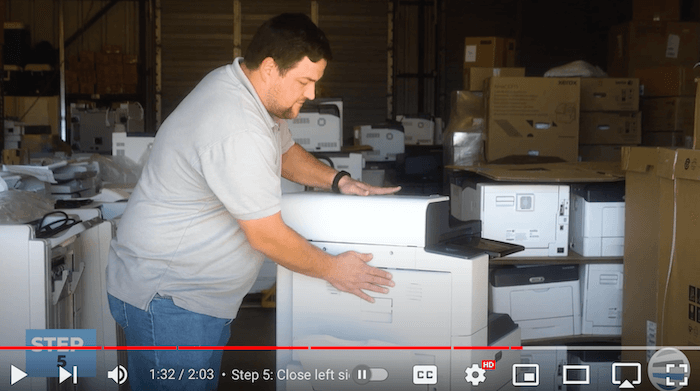
Once the new transfer roller is securely in place, close the left side cover of the printer. Ensure the rear and front latches are properly engaged to prevent any issues.
And that's it! You've successfully replaced the transfer roller on your Xerox printer. With this simple maintenance task done, you can expect improved print quality and reliable performance from your printer.
Stay Alert for Your Printer's Warning Messages
Please be on the lookout for any warning messages from your Xerox device indicating low supply levels. When you see this message, replace your transfer roller immediately to avoid any streaks on your documents and keep your printer running smoothly. Remember, a little maintenance now can save you from bigger headaches down the road. Thanks for keeping your device in tip-top shape!
If you're interested in learning how to increase the lifespan of your printer/copier, check out our blog on eight maintenance tips.
Your Printing Journey Doesn’t Need to End Here
If you found this guide helpful and would like to see more how-to videos for this model or other Xerox printers, be sure to check out our YouTube channel, The Printing Workshop. Don't forget to like, subscribe, and share our videos for more helpful tips and tutorials. Happy printing!
If you need further assistance or have any questions, please do not hesitate to contact us. Our trained printer technicians are happy to offer tailored solutions to meet your unique needs.
