Are you struggling with changing the bypass tray roller kit on your VersaLink B625 printer? Don't worry; we've got you covered. In today's blog post, we'll take you through a detailed, step-by-step guide on replacing the bypass tray roller kit, making the process simple and stress-free. Follow along with Matthew from the Printing Workshop as he walks you through each step in this quick and informative tutorial.
Read our review of the Xerox VersaLink B625
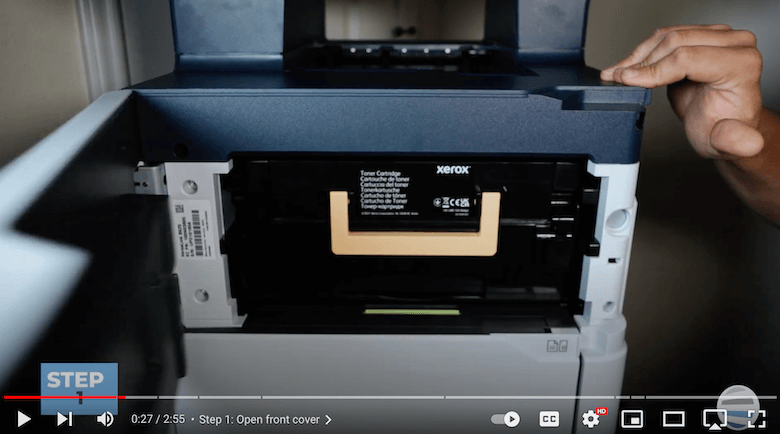
Step 1: Open the Front Cover to Access the Bypass Tray Roller Kit
The first step is to open the front cover of your VersaLink B625 printer. As Matthew demonstrates, the front door swings to the left conveniently, revealing a green handle located beneath the toner.
Step 2: Pull on the Green Handle
By pulling on the green handle, you will slide out the duplex drawer
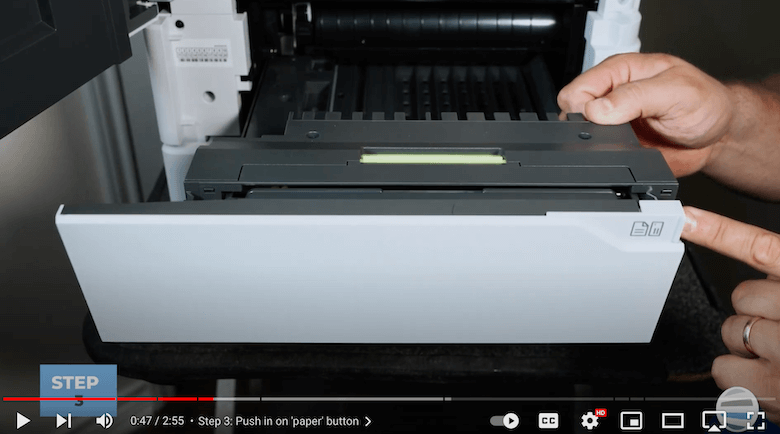
Step 3: Push in on ‘paper’ button
Once the duplex drawer is removed, take notice of the envelope and paper area. To access the bypass tray roller kit, push in on the 'paper' button and lower the bypass tray. This exposes the bypass tray roller kit, which is crucial for the replacement process.
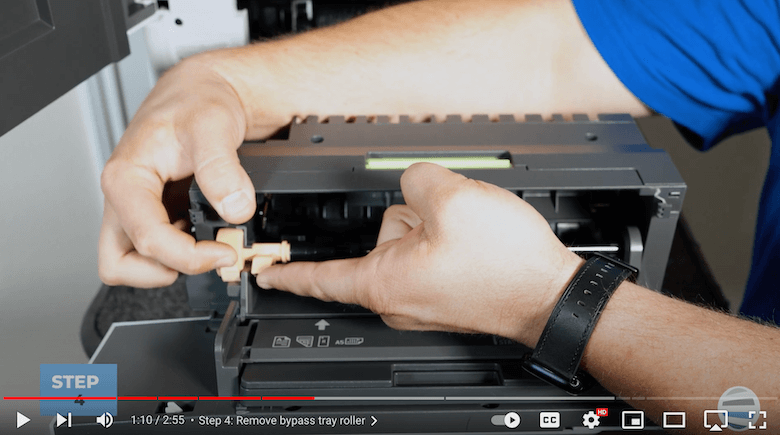
Step 4: Remove the Old Bypass Tray Roller Kit
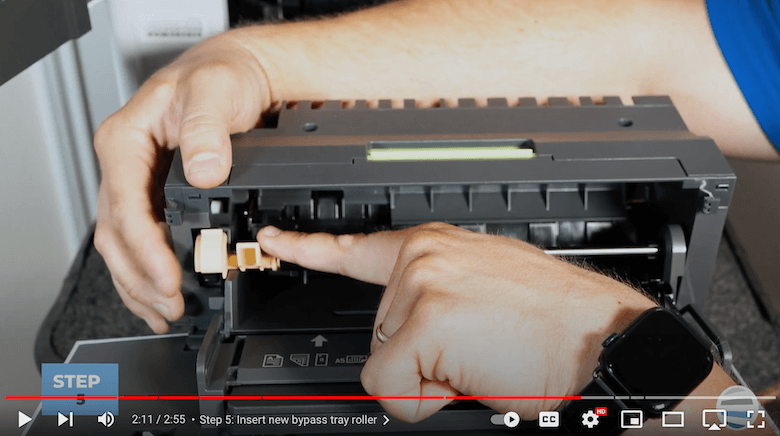
Matthew provides a clear demonstration of how to remove the bypass tray roller kit. On the far-left side, there's a small orange clip. Push it up against the larger orange piece, simultaneously pushing up on the inner orange handle. Twist the orange assembly, and the kit will slide out easily. Afterward, pull it out from the slot to the left.
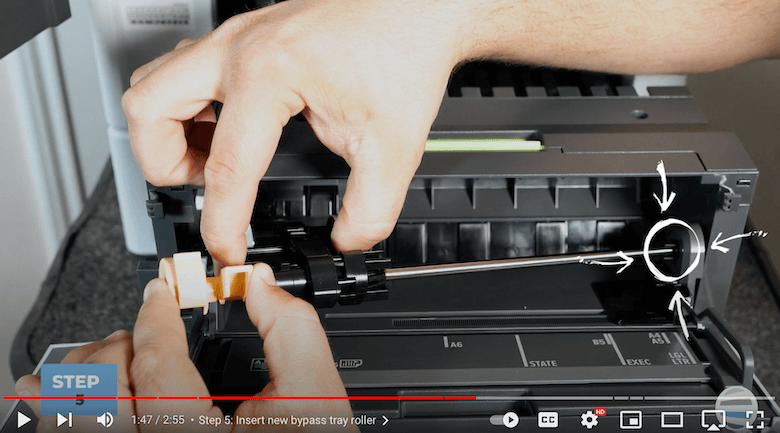
Step 5: Install the New Bypass Tray Roller Kit
Now that the old bypass tray roller kit is removed, it's time to install the new one. Matthew walks us through the process, ensuring that the rollers are hanging down. Simultaneously, lift the rollers back up to the rear, slide the silver rod into the right side, and align the orange part with the gray housing area. At this point, your silver rod should be straight and flat. Once in place, push down on the inner orange handle until it clicks, indicating that the kit is securely installed.
Step 6: Complete the Replacement Process
With the new bypass tray roller kit in place, close the bypass area, slide in the duplex drawer, and close the front door.
Want to know about the cost of printer supplies? Read our blog on how much printer/copier supplies cost.
And You’re Done!
You've successfully replaced the bypass tray roller kit on your VersaLink B625 printer. Matthew's tutorial provides a clear and concise guide, making this seemingly complex task accessible to everyone. Understanding this crucial maintenance process ensures smooth, uninterrupted printing which enables your business to remain productive. Your confidence in DIY printer care has just soared!
Ready for more printing hacks?
If you found this tutorial helpful, subscribe to our YouTube channel The Printing Workshop for regular tips and troubleshoots. Your support motivates us to continue creating valuable content to make your printing experience hassle-free. Empower your printing experience today!
If you have a problem with your printer that can't be fixed easily, reach out to STPT and one of our trained technicians will gladly help you.
