In the fast-paced world of printing, optimal performance and print quality are essential to keep up with the competition. Regular maintenance is key to achieving this, and one of the most crucial aspects of printer maintenance is replacing drums. It may seem like a daunting task, but fear not! With the right guidance, you can learn to change drums like a pro. In this blog post, we'll take you step-by-step through the process of changing drums on a Xerox VersaLink C7030 printer, as demonstrated in an informative video by Matthew from The Printing Workshop. With his expertise, you will be ready to boost your printer's performance and achieve top-quality prints!
Note: This guide also works for the C7020 & C7025 models in the Xerox VersaLink C7000 series.
If you’d like to know how to make caring for your printer easier, consider our blog on the benefits of investing in a maintenance plan for your multifunction printer.
Step 1: Open the Front Cover
The first step in the drum replacement process is to open the front cover of the Xerox VersaLink C7030. Locate the waste cartridge, marked as R5, at the front of the printer.
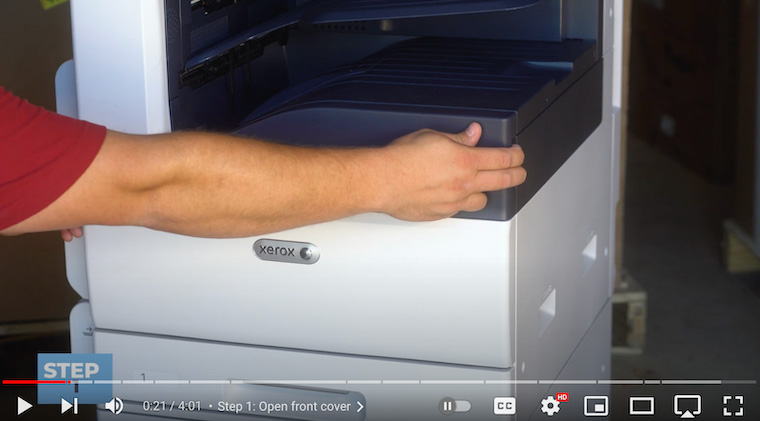
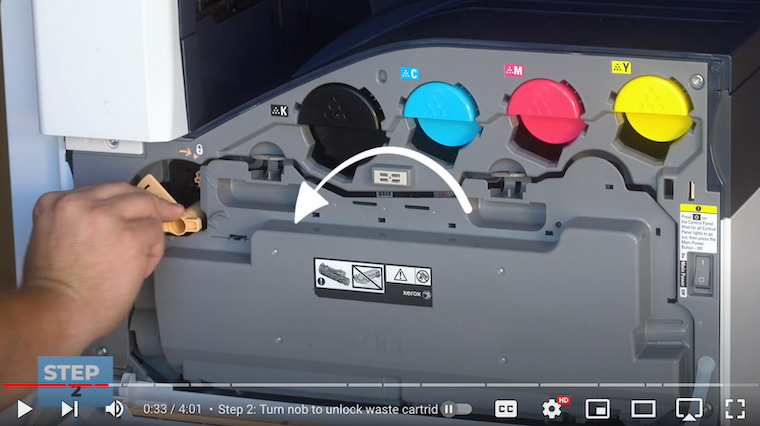
Step 2: Turn the Latch to Unlock the Waste Cartridge
To remove the waste cartridge, turn the orange latch counter-clockwise to unlock it.
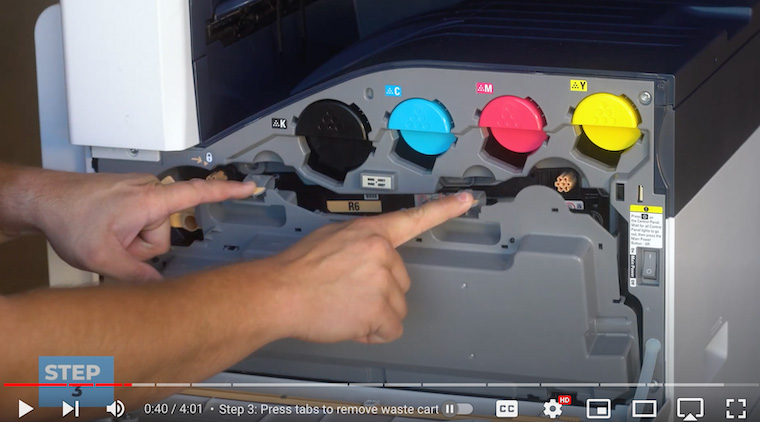
Step 3: Press Tabs to Remove the Waste Cartridge
Remove the waste cartridge by pressing down on two latches with orange stickers on top.
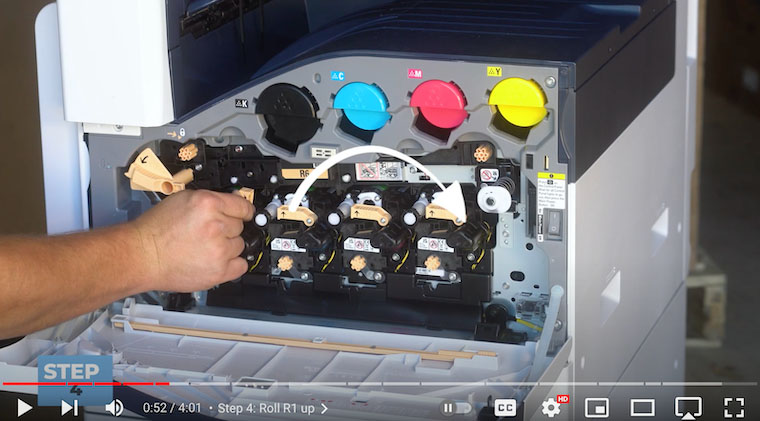
Step 4: Lift 'R1' Lever Up
With the waste cartridge out of the way, shift your attention to the black drum labeled as R1. Roll the R1 orange lever up and out of the way.
Step 5: Unscrew Finger Screw
Right below the drum (R1) is a small orange screw. Unscrew it counterclockwise and push it down.
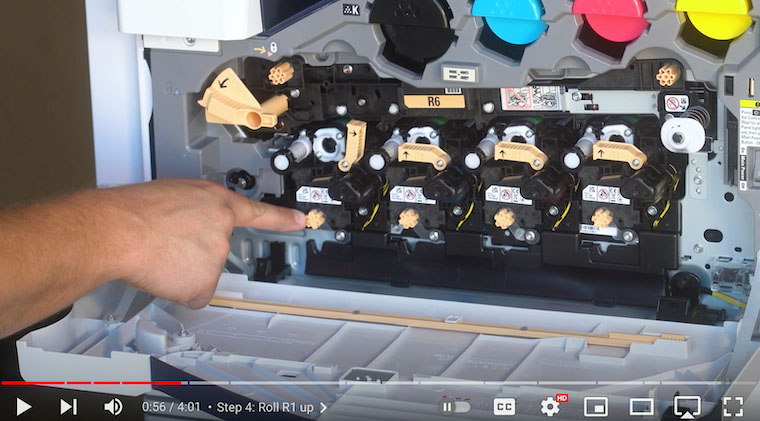
Step 6: Pull out the Drum
Now take your thumb and put it on top of the orange sticker with three black dots. Squeeze and pull straight out. Always be very careful to avoid touching the green surface to prevent print quality issues.
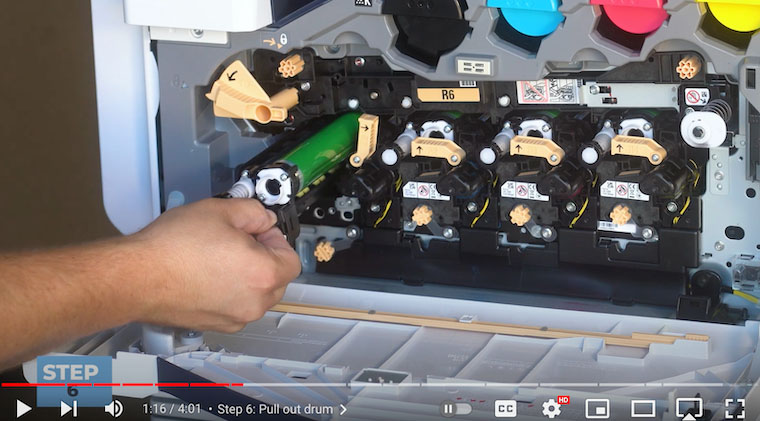
Step 7: Insert New Drum
Once you’ve unboxed your new drum, make sure to only touch the black plastic housing. Grab the little handhold with the orange sticker to get a good hold of the drum. The bottom of the black plastic will act as a guide to insert the new drum.
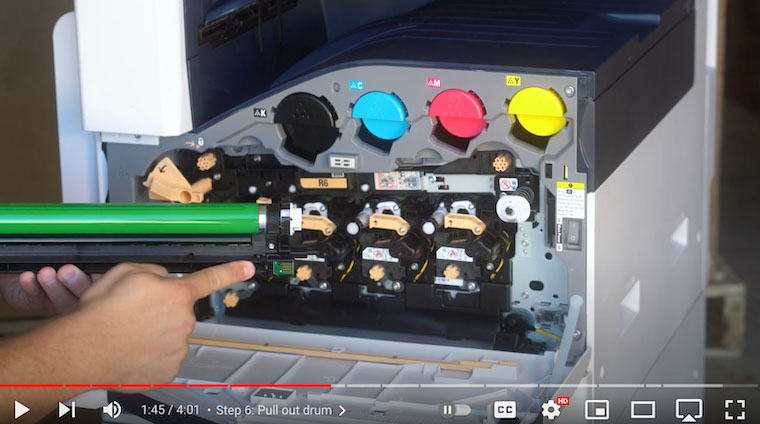
Slide the drum back into the empty slot (pictured below) until you hear a click.
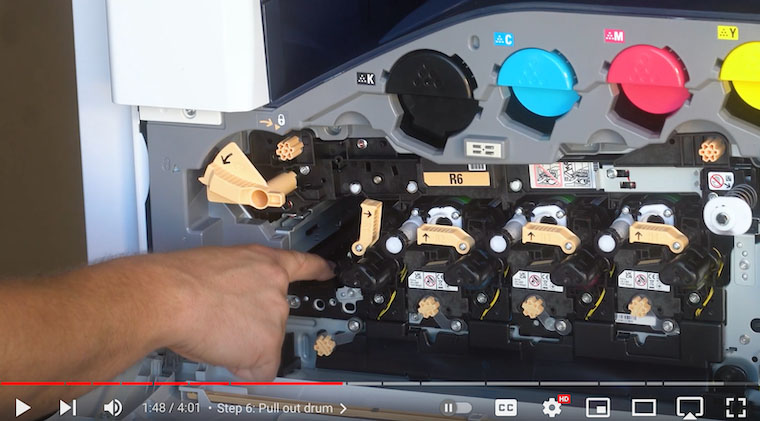
Step 8: Screw in Finger Screw
Secure the new drum by pushing the orange finger screw upwards and tightening it in a clockwise direction. Don’t overtighten it, just get it nice and snug.
Step 9: Roll R1 Down to Lock Drum
After securing the drum, roll the R1 lever back down to lock the drum in place. This step ensures that the new drum is properly positioned and ready for use.
Step 10: Clean the LED Array Underneath the Drum
Clean the LED array under the drum to prevent toner from falling on it and causing print quality issues. Use the orange cleaning tool inside the front cover.
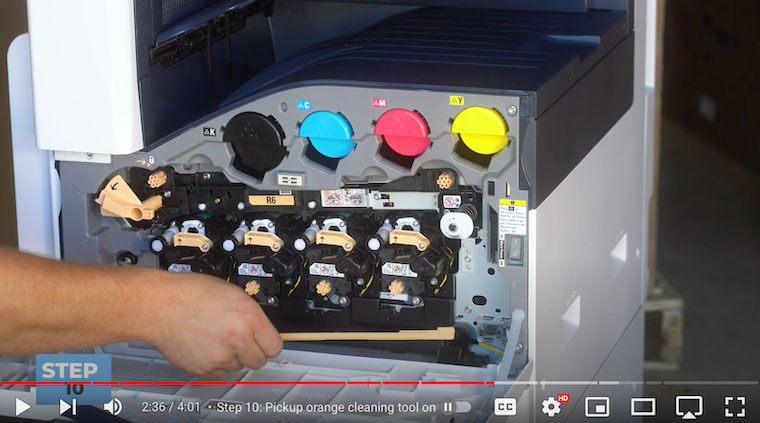
The grey felt on the tool goes up.
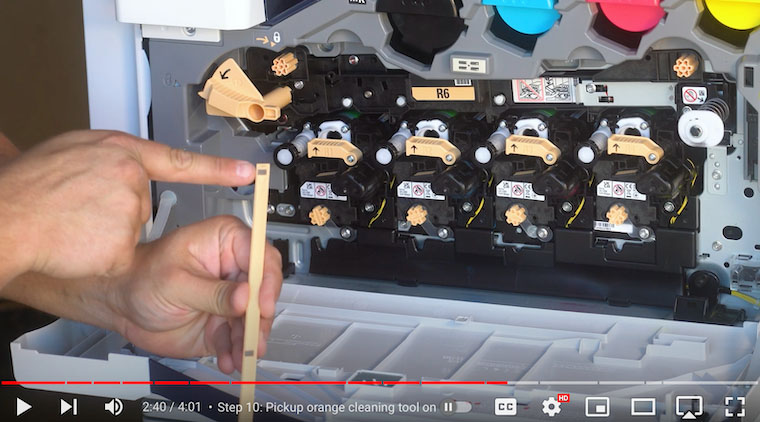
Slide it down the array about three times to ensure a thorough cleaning process and then put the tool back in its place.
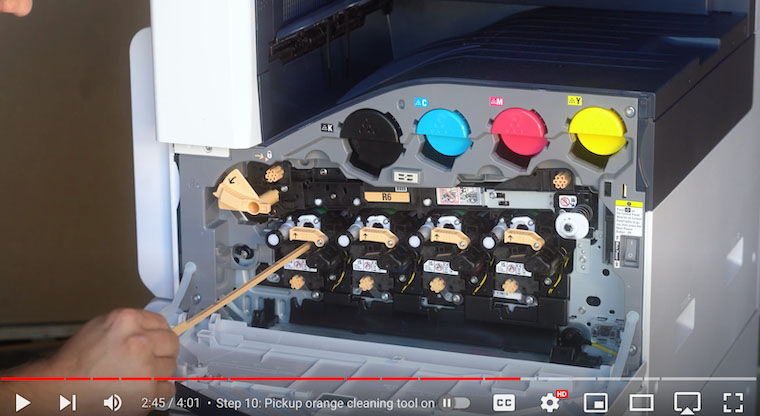
Pro Tip: Many people forget this step! Don’t overlook this important step to ensure the best possible print quality.
Step 11: Re-insert the Waste Cartridge
Place the waste cartridge back into the black feet inside the printer and push it upwards until the top latches click into place.
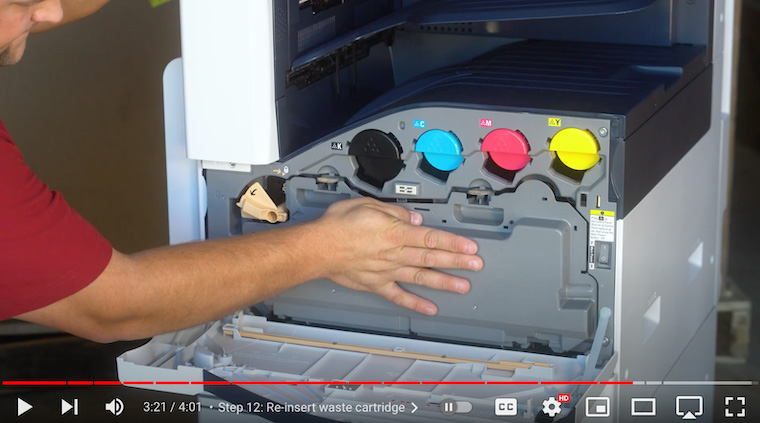
Step 12: Lock Waste Cartridge in with Orange Latch
Lock the waste cartridge into place by turning the orange latch clockwise.
Step 13: Close the Front Cover
The final step in the drum replacement process is to close the front cover of the printer.
Print Perfection: Mastering Xerox VersaLink C7000 Series Drum Replacement for Optimal Performance
Through this easy-to-follow guide, you now understand the process of changing drums on a Xerox VersaLink C7000 series printer. Routine drum replacement is essential for optimal printer performance and to extend its lifespan.
As you’ve seen in Matthew's tutorial, changing the drums is a simple process with the right guidance. Regular maintenance can help you get the most out of your printer and ensure it operates smoothly for years to come.
Take control of your printer's health and longevity by incorporating this drum replacement guide into your regular maintenance schedule.
If you are wondering if your printer might be getting old, check out our blog on the 4 signs it may be time for a new copier printer.
Get a Hold of More Expert Tips
If you found this blog helpful, don't forget to like and subscribe to our YouTube channel, The Printing Workshop, for more insightful tutorials and maintenance tips. Stay informed, keep your printer in top condition, and make your printing experience consistently flawless.
We understand the frustration of dealing with printer problems. That's why our team of highly skilled technicians is always here to help you out. If you encounter any issues with your printer, don't hesitate to contact us. We'll be more than happy to assist you in resolving any problems you might have.
