As you prepare to tackle your daily office tasks, you suddenly see an alert demanding a replacement of your printer's cartridge. Panic sets in, and you wonder how to navigate this process. With time ticking away, the pressure mounts. The last thing you need is a printer malfunction throwing a wrench in your plans when you have an important project to complete.
But don't worry! STPT is here to help. We understand how urgent it is to have smooth printing operations. Delaying the replacement of your cartridge could cause poor print quality and unnecessary stress.
That's why Matthew, our resident print expert with years of experience, will guide you step by step through the cartridge replacement process. In this comprehensive blog, he’ll explain the procedure for the Xerox AltaLink B8090 model, ensuring you're up and running again in no time.
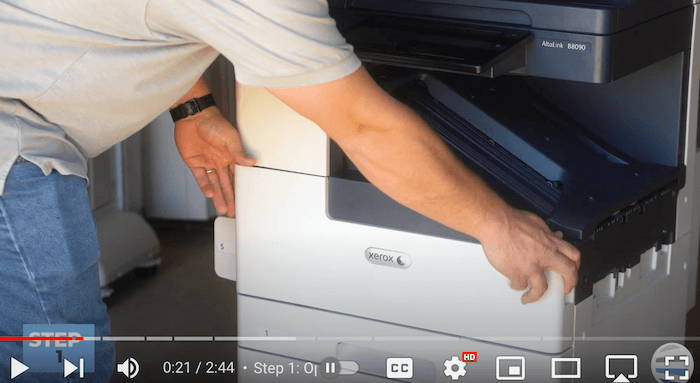
Step 1: Open the Front Cover
Begin by opening the front cover of your Xerox printer. This will give you access to the internal components necessary to replace the print cartridge.
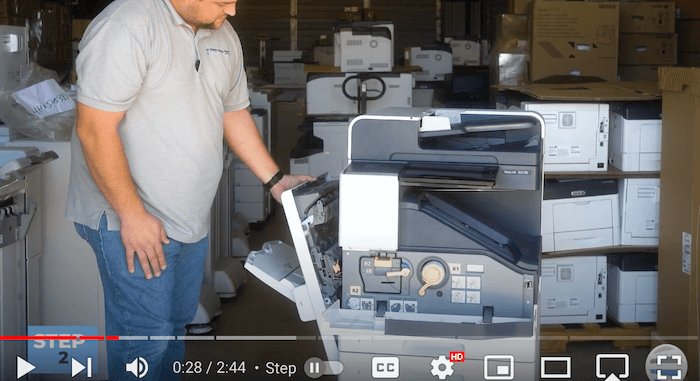
Step 2: Open the Left Side Cover
Next, you'll need to open the left side cover of the printer. This step provides additional access to the toner cartridge, making it easier to remove and replace.
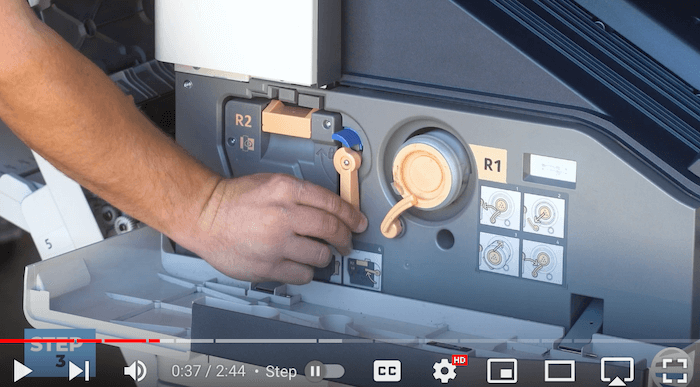
Step 3: Unlock the Orange Latch
Locate and twist the orange latch counterclockwise to unlock the toner cartridge for removal.
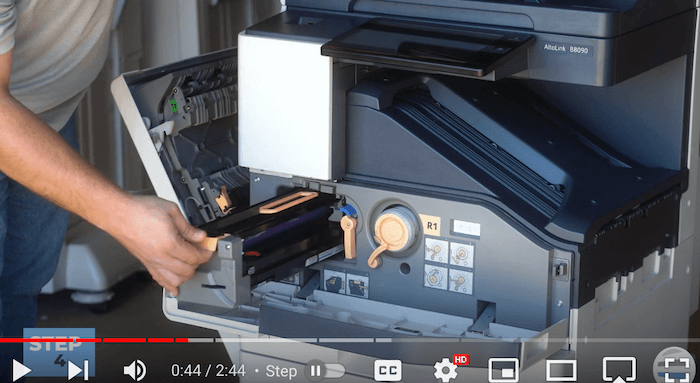
Step 4: Pull Out the Cartridge Until You See the Orange Top Handle
With the latch unlocked, grab the orange handle at the top of the cartridge and gently pull it out until you reach the long orange carrying handle on top.
Step 5: Use Your Other Hand to Hold the Top Handle and Pull All the Way Out
Once you've reached the orange carrying handle, use your other hand to grip it securely. Then, continue pulling the cartridge out of the printer until it's fully removed.
Pro tip: Avoid touching the purple surface to prevent damage.
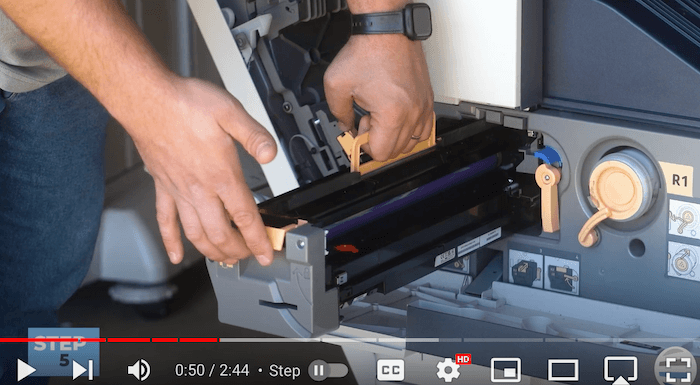
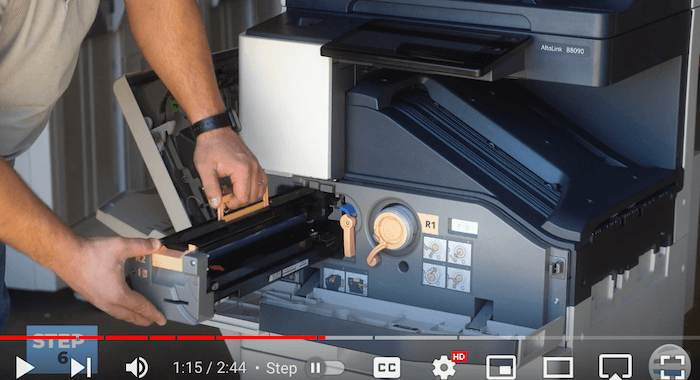
Step 6: Insert New Cartridge
Carefully unpack your new toner cartridge and hold it by the gray plastic front for stability. Then, insert the cartridge into the printer and slide it in.
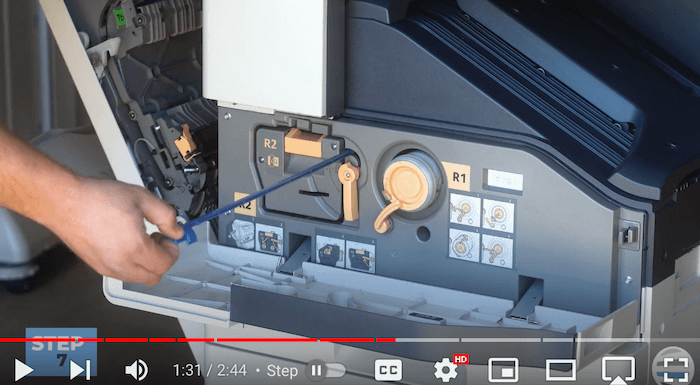
Step 7: Clean the LED Light Array
To keep print quality at its best, use the blue handle provided to clean the LED light array inside the printer. Pull the blue handle out and move it in and out three times to clean the light array thoroughly.
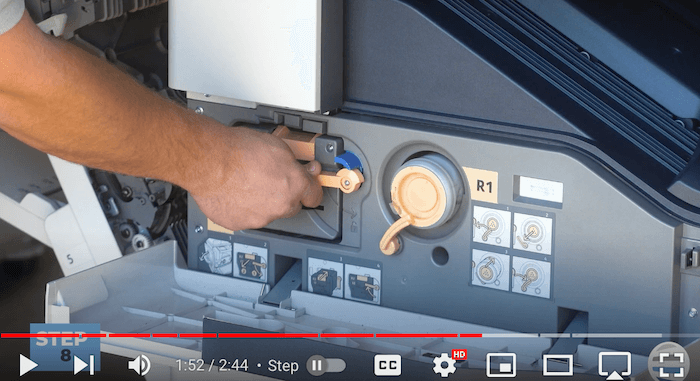
Step 8: Lock Orange Latch
Once the LED light array is cleaned, lock the orange latch on the toner cartridge by twisting it back into place slowly and deliberately. This prevents toner from raining back down onto the cleaned light array.
Step 9: Close Left Side Cover
Close the left side cover of the printer, ensuring that both the front and rear latches are properly latched.
Step 10: Close Front Cover
Finally, close the front cover of the printer to complete the toner replacement process. With everything securely in place, your Xerox AltaLink B8090 printer is ready to resume printing operations.
Ensure Timely Print Cartridge Replacements
To keep your Xerox AltaLink printer running smoothly and producing top-notch prints, you should replace the toner cartridge when prompted. Be on the lookout for warning messages from your Xerox machine to ensure a timely print cartridge replacement. By doing this, you can extend the life of your printer and keep those prints looking amazing.
Toner cartridges are crucial for laser printers. While replacing them is a simple task, recycling them is just as important. And the good news is, it's easier than you might think. If you want to learn how to properly recycle toner cartridges and printer supplies, read our guide. It's a quick read that will inspire you to join the movement towards a cleaner environment.
Need More Quick Printer Fixes?
If you found this guide helpful, check out our YouTube channel, The Printing Workshop, for more how-to videos and tricks on maintaining your Xerox printer. Also, like, subscribe, and leave a comment with any questions or feedback. From all of us at the printing workshop, thank you for watching!
If you have any questions or require further assistance, please do not hesitate to contact us. Our trained printer technicians will happily provide customized solutions to your specific needs.
