Today, we're diving into the essential task of changing the scanner maintenance kit on the VersaLink B625. Regular maintenance is crucial to ensure your printer operates smoothly and produces high-quality prints. In this step-by-step guide, we'll walk you through the process, making it easy for you to maintain your equipment and keep it in top-notch condition.
Read our review of the Xerox VersaLink B625
Section 1: Separator Roll
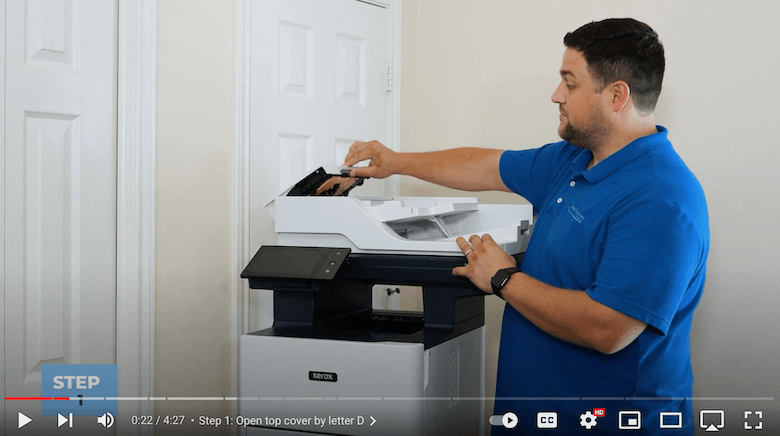
Step 1: Open the Top Cover
The first step is to open the top cover. Locate the gray latch next to the letter D, lift it up, and watch as the entire top section opens. This exposes two crucial components of the scanner maintenance kit: the pickup rolls and the separator roll. First let’s begin with the separator roll.
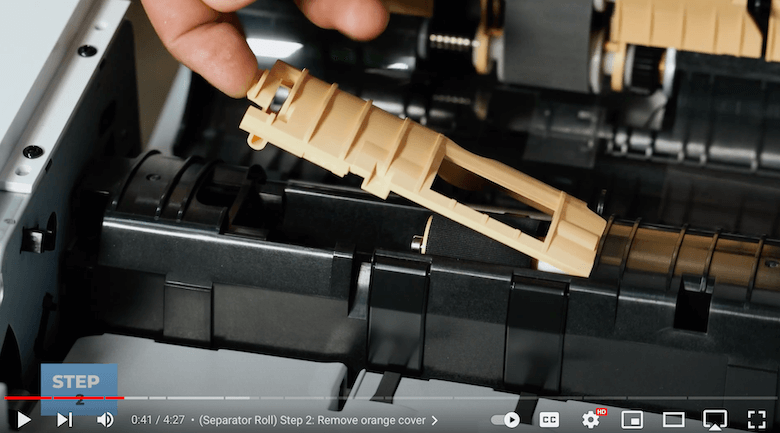
Step 2: Remove the Orange Cover
To expose the separator roll, remove the orange cover by pushing it rearward on the latch at the front of the cover.
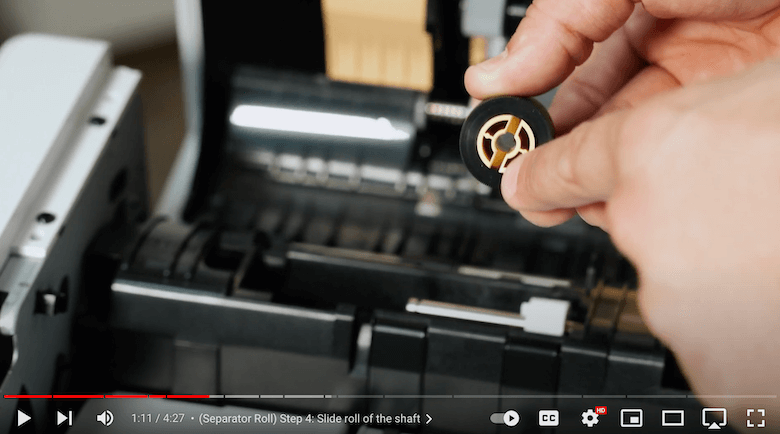
Step 3: Remove the Separator Roll
Once removed, pull the small orange tab back to release the roll, then slide the roll off the shaft. Remember the orientation of the slots in the back of the roll, as they will mate with the white clutch.
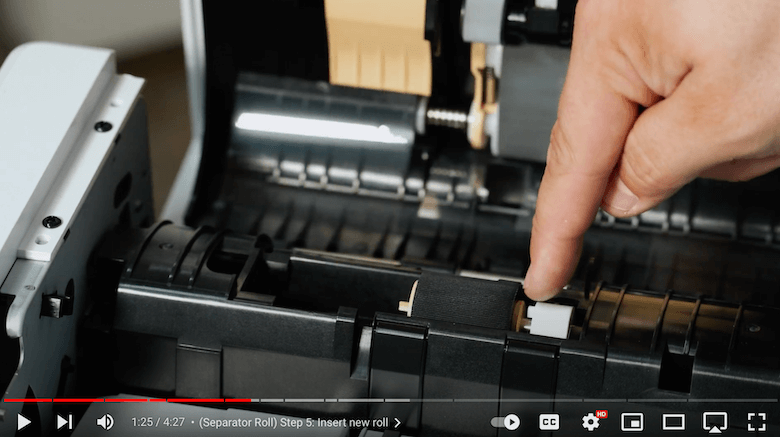
Step 4: Insert New Separator Roll
Insert the new roll by sliding it back into the shaft, ensuring the slots align, and reattach the orange cover.
Section 2: Feed Roll Maintenance
Step 1: Remove Orange Cover
Moving on to the feed rolls, remove the orange cover by pushing it down with two fingers and swinging it out.
Step 2: Swing Assembly Up
For the top feed roll, rotate it up, press the orange nob to the rear, and slide the assembly off the shaft.
Step 3: Remove Bottom Roller
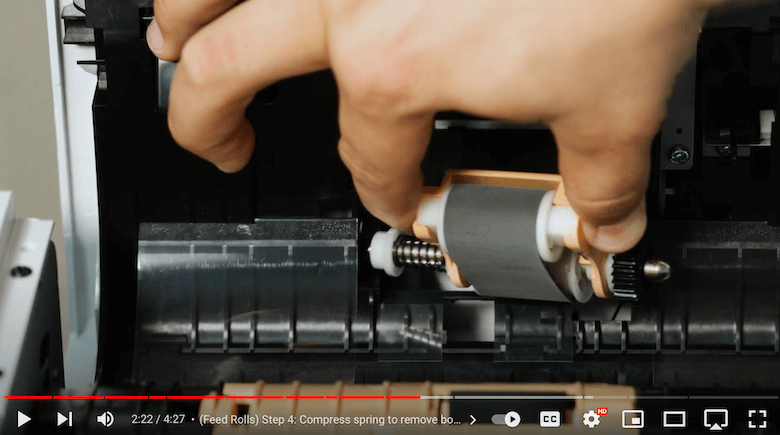
For the bottom feed roll, you will need to grasp the whole orange assembly between two fingers. Then compress the spring, twist and turn the assembly, and pull it to the rear.
Step 4: Replace the Bottom Roller
Insert the new bottom roller’s white bushing into the black housing, keeping it at an angle, and press the spring. Swing the assembly inside, allowing the pickup roll's shaft to go into the rear brass bushing. Swing the assembly back into place.
Step 5: Insert New Top Roller
For the upper pickup roll, insert it into the cavity with the orange part towards the front of the machine. Slide it to the rear onto the shaft and push it down.
Step 6: Replace the Orange Cover and Close the Top Cover
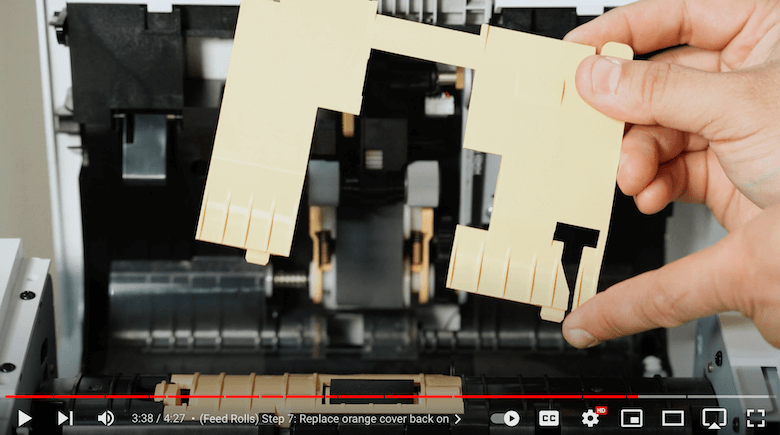
To complete the feed roll maintenance, replace the orange cover, ensuring the two teeth match the two holes in the black housing. Swing the assembly back into place and click it securely. Close the top cover to finish the process.
Voila! You’ve successfully replaced your maintenance kit.
If you want to learn about other printer issues, read our blog on the 9 common printer problems (solutions).
Maintain Peak Printing Performance
Mastering the art of replacing the scanner maintenance kit for your VersaLink B625 is vital for maintaining peak printing performance. By following this step-by-step guide, you empower yourself to ensure smooth operations and top-notch print quality.
Want More Printer Tips?
For more insightful tutorials and answers to your printing queries, subscribe to our YouTube channel The Printing Workshop. Take control of your printing journey – it's time to print confidently and efficiently!
Please contact us if you have any further questions that can’t be easily answered through tutorials, our printer technicians will be happy to help you.
